

This project is a Individual Addressable LED Strip.
I have bought an WS2815 Led Strip which is addressable per LED instead of the whole led strip has the same color, this led strip can be colored per led. This is giving way more possibilities for effects etc.
First of all I have connected the Led Strip with an power source. Calculation makes about 14,5W per meter, so for my 4 meter LED strip I need about 58 Watt power supply. As it is a 12V strip a 5 Amp power supply would be OK, so to be sure I bought the 6 Amp.
An important thing to know is color issues with longer led strips. As the strip becomes longer there is a higher possibility of voltage drops when powering the led strip only at the beginning. Voltage drops means inproper colors. This issue is more often with an 5Volt strip, therefore my choice is an 12V strip as it has less issues with voltage drops and properly have enough with 1 power source at the beginning as long as the strip is not to long (<5m). This could also be an issue with the Data pin, as it wants actually 5V, but it should work with 3,3V also as the strip is not to long. The NodeMCU is giving 3,3V on the D5 pin, i did not found any issues with it, otherwise you should use a Logic Level Converter to convert from 3,3V to 5V for the Data pin.
For the controller I have chosen to work with an NodeMCU with FastLED project and MQTT. As I want to control it with Home Assistant.
Here is the wiring schema:

Now within Arduino IDE download and open the following project:
https://github.com/pinkywafer/PinkyLEDs
and in the Sketch install the following Libraries and Boards:
- Board Manager:
- ESP8266 Boards Version 2.5.0 (installed to arduinoIDE in boards manager)
- Library Manager:
- ArduinoJson version 5 (I’m using version 5.13.5) (Will not work with version 6)
- PubSubClient version 2.7
- FastLED version 3.1+ (I’m currently using 3.2.6)
- ESPAsyncE131 version 1
Set the Board on NodeMCU1.0 , speed on 115200 and flash size 4M (3M SPIFFS). Set port on the right COM Port.
Now within config.h tab, change your settings for MQTT, LED strip settings and Wifi settings. Count the amount of LEDS and give in the value and as the LED _TYPE i used the WS2812 and DATA_PIN ‘5’, not ‘D5’ as the NodeMCU does not want to accept ‘D5’. I Also comment out ENABLE_E131. My strip has GRB format of coloring.
Upload your sketch to the NodeMCU.
Within Home Assistant i am using the following code:
light:
- platform: mqtt
  schema: json
  name: "YourLEDname"
  command_topic: "cmnd/YourLEDname"
  state_topic: "stat/YourLEDname"
  availability_topic: "LWT/YourLEDname"
  payload_available:  "Online"
  payload_not_available: "Offline"
  white_value: true
  optimistic: false
  rgb: true
  flash_time_short: 1
  flash_time_long: 5
  brightness: true
  effect: true
  effect_list:
    - "Confetti"
    - "Glitter"
    - "Juggle"
    - "Sinelon"
    - "Solid"
    - "Christmas"
    - "Candy Cane"
    - "Holly Jolly"
    - "Valentine"
    - "Lovey Day"
    - "St Patty"
    - "Easter"
    - "USA"
    - "Independence"
    - "Go Blue"
    - "Hail"
    - "Touchdown"
    - "Halloween"
    - "Punkin"
    - "Thanksgiving"
    - "Turkey Day"
    - "BPM"
    - "Cyclon Rainbow"
    - "Dots"
    - "Fire"
    - "Lightning"
    - "Police All"
    - "Police One"
    - "Rainbow"
    - "Glitter Rainbow"
    - "Ripple"
    - "Twinkle"
A great colorfull result: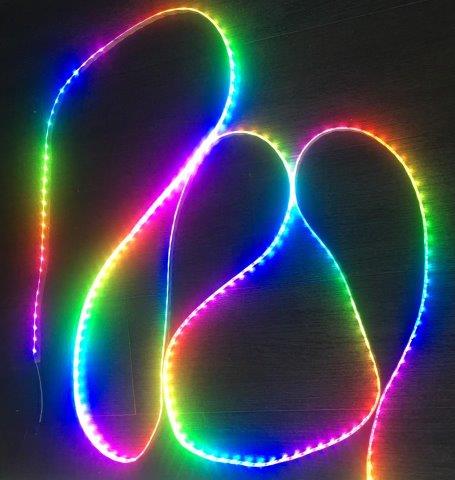
Shopping list:
Led strip: https://nl.aliexpress.com/item/33018542884.html
(my choice: 4M 60LED IP65)
Power Supply: https://nl.aliexpress.com/item/32959876153.html
NodeMCU: https://nl.aliexpress.com/item/32665100123.html
(my choice: NodeMCU with CP2102 chip)
12V to 5V converter: https://nl.aliexpress.com/item/32958965769.html
(my choice: with micro USB)
As this sketch supports OverTheAir (OTA) flashing, you can change or update your code directly over IP from ArduinoIDE.
Update 2020:
In the meantime Home Assistant has made an integration for WLED. Check this github project. You can simply flash this project tot the NodeMCU or Wemos and then integrate it in Home Assistant with the newly WLED integration.
Hi Martin,
want to buy those strips for a upgrade of a existing project (choice for 12v is to lower the amps needed)
you mentioned that the data could be 5v (3.3v from ESP32 works fine for my project)
So, if i get it right, power is 12Volts, data is 5volts, no need to convert the data line to 12volts also then?
Shorting B1 to ground on the first pixel was mentioned in a forum, did you do that too?
Grtz,
Yves
No need to convert the data line. I did not use any converter for it. Perhaps it depends on your type of strip
Thx Martin,
Will buy a strip and give it a go on 3.3v with the neopixel lib
Keep you posted!
Grtz,
Yves